

CRAFT STUDIO AND HOME OFFICE REMODEL: PART ONE
Happy New Year! I’m so happy it’s 2016. As I’m planning out my year, setting goals, and thinking about projects for the blog, the organization is top of mind. Are you like me and have a hard time concentrating when you’re surrounded by mess? I love having things in their place and it’s important the space where I spend most of my time is well organized. This brings me to my craft studio and home office remodel. Welcome. Come take a look at the project that tested my design and space planning skills. This room has multiple uses and requires a solid plan that would optimize the space with great storage and organization of office equipment, arts and crafts supplies, and exercise apparatus.
Before I show you the final results, let me take you on a tour of the space and how I utilized it for two years before the remodel.
We were living in a two-bedroom rental before buying our home. The second bedroom was my husband’s man cave. At the time I was a full-time, remote employee and my home office was in the corner of our living room sectioned off by a room divider. Even with a room divider to hide me, I still felt like the home receptionist. When you came through the front door and walked past the room divider, I was there to greet you. That was my home office for almost two years. I needed my own space and it was my first must-have on our new home checklist. While touring our home I knew the upstairs space would be my domain. I couldn’t wait to be away from the front door and in a place where I could spread out and set my creative side free.
This is what this space looked like when we saw the house. It’s a nice room measuring 14 feet long by 11 feet wide with south-facing windows. It is an attic room with pony walls that measure 53” high, but the room is wide enough that you don’t knock your head on the ceiling unless you get close to the wall.

After we moved in I quickly discovered this end of the room would challenge me, and furniture placement wouldn’t always work due to the small built-in desk and built-in dresser. The original homeowners built this space for their tween daughter. That desk was definitely meant for a little person. It was never possible to push in a chair and sit comfortably. Even though the desk and built-in dresser offered a nice amount of storage, I still couldn’t get organized. The room always felt cluttered and dark. With all the light, the yellow paint was such a dingy color. The Berber carpet made it darker and it was showing its age. The computer equipment was everywhere cluttering the floor and my desktop. I had such a hard time being productive in this space.


On the other side of the room I had a credenza that offered more storage, and I still couldn’t get organized.

This room wasn’t working for me. The clutter and lack of light sources in the room didn’t provide a good working environment. After two years of spending the majority of my day in this space, I had a good sense of what needed to change.
I got out the graph paper and went to work planning my new craft studio and home office. The first thing I did was create a current floor plan and list out all the possible art and craft projects I like to work on and make a list of all the equipment each project requires. This helped me understand the storage I would need for all the supplies. I have a few machines I use frequently, a sewing machine, the Cricut Explore, a printer, a desktop computer, and a work laptop to name a few. After thinking through all the possibilities I realized I needed one long tabletop with storage underneath. That meant the built-in desk would need to come out. But what about the built-in dresser? Was it providing the best storage? What furniture would be placed on that side of the room? Why not demo both built-ins and start with a clean slate?

Having a clean slate was the solution. As I mentioned, the room is multi-purposed beyond being a craft studio and home office. I need a place to stretch, a space for yoga or exercise, or enough room to hula hoop if I wanted. We don’t have a guest room currently, so it would be nice to have a space where a guest could sleep. It would also be great to just have a place to lounge and watch TV while I worked on a craft. Should the furniture be modular and give me the chance to move it around? I had so many ideas I just needed to edit them down. The one important element that came into play was the door into the room and the small closet. The door is offset and I didn’t want to block access to the closet. I also didn’t want to block the one heat source which is located near the door in one of the pony walls. So I decided to start the design process at the end of the room with the windows. Aha! My immediate idea was to divide the room. On one half there would be a work space, and the other half a lounging area.

That worked! Seven feet of tabletop space on both sides would be great. One dedicated to work and the other dedicated to arts and crafts. Then I got to work thinking through all the storage solutions. I determined if I used kitchen cabinets the work spaces would be taller and provide loads of storage underneath. With that in mind I created the initial elevation sketch below. I lived with that sketch for weeks and had fun overlaying different items to be sure it would really work. This was a great way to finalize my design and start working on a budget. What was all of this going to cost? Could we stay under $10,000 which would include all new flooring for the top floor? That Berber had to go. It had so many snags and runs. It was starting to ripple. Lincoln, our cat thought it was one big cat scratcher, and was destroying it at the top of the stairs. The previous homeowner had burned the carpet in multiple places with an iron. It had to go.

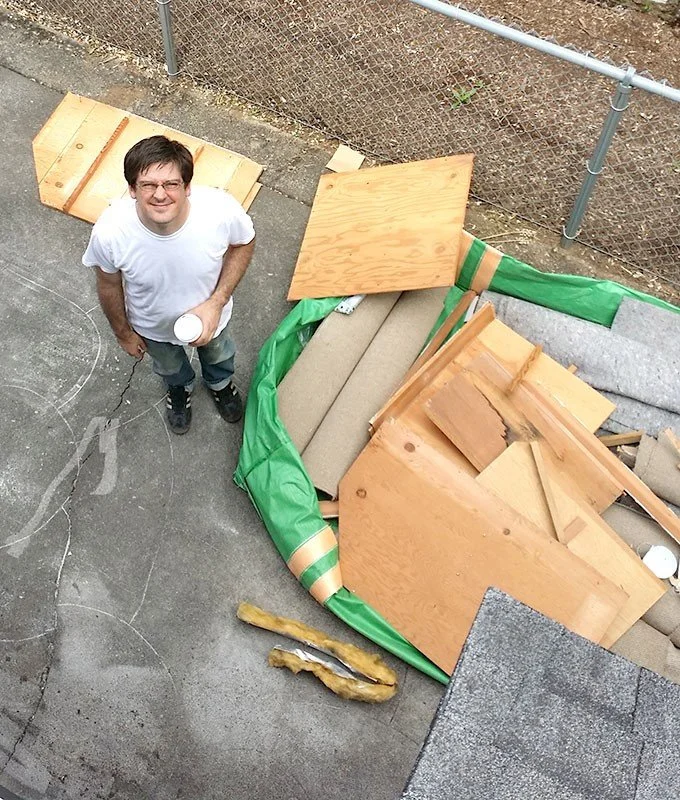
The budget was set. Doing the demo on our own would save us a lot of money, so that’s where we started. We picked up a Waste Management Bagster, cleared out the room and I went to work pulling carpet, tack strips and staples. That was a lot of work and took the most time.
What we discovered under the carpet was nine inch tile flooring that most likely had asbestos due to the age of our home. The tiles were in good shape so we didn’t disturb them at all. Too bad they weren’t attractive because we might have considered sticking with that tile. But I didn’t like them, even after a good mopping and scraping off old paint splatters. Plus, I wanted fresh and new and the space to be bright. I wanted a floor that was easy to clean and had some sound dampening. I’ll reveal later the flooring I chose.
With the help of my awesome husband, demoing the desk and dresser was pretty easy. I will say that desk was well built. It was solid and we couldn’t break it down until we pulled it out of the wall. Luckily we have open crawl space storage on both sides of those pony walls and could get in there to make the demo a little easier.


The Bagster is awesome for these small demo projects. You have a great time throwing everything out your second story window onto your driveway. Fill up the bag, drag it to the curb and they come take it away after you schedule a pick up. Easy!
For this type of project, it helps to keep your partner energized and happy with his favorite coffee drink.
Now we have a clean slate. Come back for part two and you’ll see what floor we chose, the cabinet install and a few other details. Stay tuned.